Autossh for OPNsense
The Autossh plugin for OPNsense is a wrapper around the autossh system-package that makes it possible to create persistent and reliable SSH based tunnels from remote-to-local; local-to-remote; or dynamic SOCKS5-based forward. All tunneled within the safety and security of a standard SSH connection.
SSH port forwarding (and by extension Autossh) can be used to solve a wide range of network-service access challenges by using TCP port-forwards that are possible without the fussiness of setting up VPN-servers and VPN-clients. If you are able to establish an SSH connection to a remote site then you should be able to create an ssh port-tunneling solution.
For example:
- Provide reverse-remote access to OPNsense-sites that have no public IP address available, as is common with ISPs using super-NAT to provision customers.
- Provide redundant multipath reverse-remote access to OPNsense-sites via individual external routes through the use of ssh-tunnel interface binding.
- Create trusted (SOCKS-based) gateways for OPNsense-sites requiring access to remote-networks, eg customer-network(s) or cloud-VPC-network(s).
- Create your own internet privacy VPN setup for OPNsense-site local network users using a SOCKS proxy (ie Dynamic-Forward) to a (temporary) cloud instance.
- Provide local network access for just-about-any remote TCP-based service such as HTTP-servers, RDP desktops, SMTP relays or other SSH servers.
- Provide all of the above in reverse, allowing remote networks the same ability to access local TCP-services.
Many SSH-tunnel based recipes and solutions are possible, check your favorite search-engine results for "ssh port forwarding".
Installation
Installation from the Threat Patrols package repository is possible using the standard OPNsense Firmware-Plugin web-interface after the os-threatpatrols plugin has been added to your system.
- Package Repository: /opnsense/repo
Keys
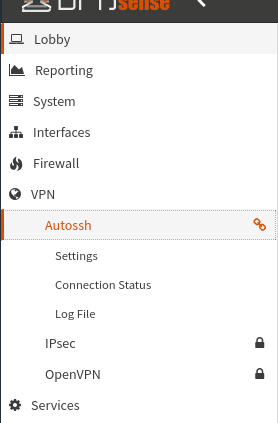
Before creating an SSH-tunnel you need to create an SSH-key from the Autossh->Settings->Keys tab.
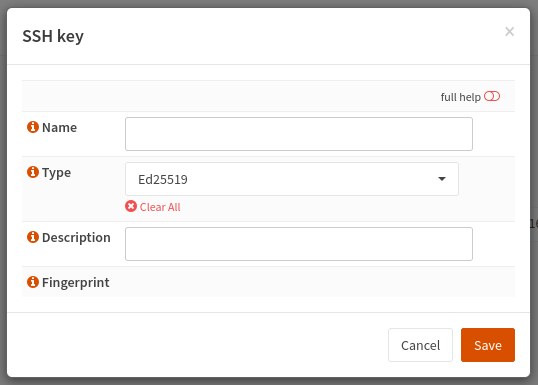
Create a key by pressing the + symbol next to the rubbish-bin symbol on the bottom right-hand-side of the Autossh->Settings->Keys tab.
Provide a name for the key and choose a desired ssh key-type if something other than the default Ed25519 is required. Most SSH-servers deployed after 2014 should support Ed25519 based ssh-keys.
The description field is a free-form text field that is not otherwise parsed.
The fingerprint value is available after generating the SSH key.
SSH Private Key
SSH keys are created within the OPNsense system itself and stored (base64 encoded) in the OPNsense configuration .xml file. There is no way to import user self generated SSH-key material.
Preventing the use of user-supplied keys is a deliberate-decision to prevent users mistakenly using keys that are also used for other purposes.
SSH Public Key
![]()
The SSH Public key is available by pressing the key-shaped icon under "Commands" in the Autossh->Settings->Keys tab.
The SSH-public key is generated with a prefix that impose restrictions on the ability to of this SSH-key to invoke a terminal-shell; forward any kind of ssh-agent from OPNsense (should not exist anyway); or forward remote X-sessions (also not expected to exist)
The SSH-public key prefix that implements these restrictions looks like this:
This limits SSH-connections to port-tunneling purposes only and means the private-key cannot be misused to gain shell access on the remote system.
Additionally, the SSH-public key is suffixed with the autossh_key_id: value that helps identify the same key in the OPNsense system.
The entire SSH-public key value should be cut-n-paste from the OPNsense user-interface to the remote system .ssh/authorized_keys file.
It is recommended that you use a dedicated service-account at the SSH-server for the purpose of operating your SSH-tunnels. If this is not possible for some reason, then recall that SSH allows users to define more than one ssh-key in their .ssh/authorized_keys file and therefore allows you to continue using any existing keys(s) while adding another ssh-public key for this tunneling purpose.
Tunnels
Tip
Create an SSH-key before attempting to create an SSH-tunnel, else your SSH-connection will not have any available keys to select and choose from.
Create a new tunnel by pressing the + symbol next to the rubbish-bin symbol on the bottom right-hand-side of the Autossh->Settings->Tunnels tab.
Each option in the add SSH-tunnel setup-form provides in-line help that describes the field (press the i icon).
Additionally, the in-line help also references the underlying ssh_config item that can be referenced for more technical-detail when required. Refer to the OpenSSH manual for the related item - https://man.openbsd.org/ssh_config
Most SSH-tunnel connections can be created with a minimum setup of:
User: username at the remote SSH-server where the SSH-public key has been added to.ssh/authorized_keysHostname: the hostname (or IP address) of the remote SSH-serverSSH key name: the name of the SSH-key previously created.- Any of
Local Forward,Remote ForwardorDynamic Forwardfor the tunnels themselves
Also pay attention to the Bind Interface since this is the interface used by autossh to create the SSH connection. If the primary-address on the Bind Interface does not have a route to the Hostname the connection will not be possible.
Create the tunnel by pressing the "Save" button.
Attention
New tunnels do not automatically start until the user navigates to Connection Status and manually starts the connection. However, once a tunnel has been started it will always work to auto-reconnect while the tunnel Enabled setting is set as true.
See the Examples section for examples in setting up common situations and scenarios.
Connection Status
The Connection Status view provides the ability to Start/Stop connections and provides a view of the SSH-connection status.
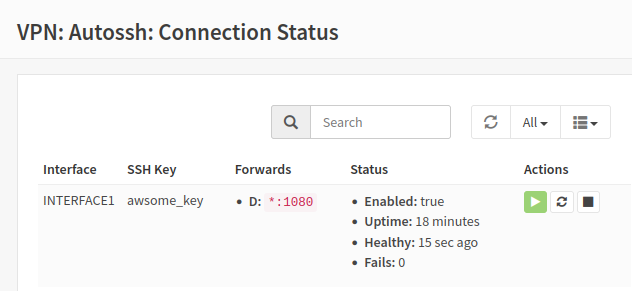
The Status column provides:
- Enabled: defines the SSH-tunnel status
- Uptime: total time the current SSH-connection has been up without failure.
- Fails: the count of ssh-connection failures for this ssh-tunnel since system start.
- Healthy: time since the last loopback health check was tested and successful. New connections report "pending" status until the first health-check (60 second interval).
The Healthy signal is derived from a feature of autossh that tests if a TCP connection is possible when passed through a loopback arrangement that consists of a port-forward to the remote-server with a port-remote that returns the same TCP connection back to the autossh process - hence the loopback.
The health-check occurs every 60 seconds and unhealthy connections are terminated and automatically recreated - this increments the "Fails" count.
Because connection health checks occur every 60 seconds, you may observe connections in a "pending" state until the first health-check completes. The ssh-tunnel may already be up and operational before the healthy signal.
Examples
Local SOCKS proxy
Scenario: provide OPNsense-site local-network users with a SOCKS proxy on the OPNsense instance that can be used by local-network users to access network resources as if they are from the remote-ssh host.
- Create an Autossh ssh-tunnel to a remote ssh-server
- Define an Autossh
Dynamic Forwardwith*:1080for this ssh-tunnel - Check your firewall rules permit local network connections to TCP1080 on the firewall
- Configure your local-network users to use the SOCKS proxy, for example in the Firefox web-browser navigate Settings->General->Network Settings and define a SOCKS Host with the local-network IP address of your OPNsense instance and TCP1080.
Danger
Make sure you do not accidentally create an open public-proxy if using a Dynamic Forward definition with *:1080
Either create appropriate firewall rules that prevent unwanted access to TCP1080 or adjust the Dynamic Forward definition to the local-network address that you wish to make the SOCKS proxy available from - ideally do both.
Reverse remote access
Scenario: OPNsense-site location receives external network connectivity via an ISP that uses Super-NATs (or carrier-grade NAT) such that the ISP customer does not have any access to a public IP address.
- Establish an ssh-server in a network where you have access (eg, hosted server)
- Create an Autossh ssh-tunnel that connects to this remote ssh-server
- Define an Autossh
Remote Forwardwith127.0.0.1:2222 127.0.0.1:22for this ssh-tunnel - SSH to the remote ssh-server and then from there ssh to 127.0.0.1:2222 which will tunnel back to the OPNsense host on TCP22 - consider setting this up using a client-side
ProxyJumpdefinition to save the manual effort of ssh'ing to the first ssh-server and then again to 127.0.0.1:2222
Local SMTP relay
Scenario: local network users require access to an SMTP that is only available in a network that exists behind an ssh-server.
- Create an Autossh ssh-tunnel to a remote ssh-server
- Define an Autossh
Local Forwardwith*:25for this ssh-tunnel - Check your firewall rules permit local network connections to TCP25 on the firewall
- Configure your local-network users to use the SMTP that now appears as if exists from the local-network IP address of your OPNsense instance.
Danger
Make sure you do not accidentally create an open smtp-relay if using a Local Forward definition with *:25
Issues
Please post issues via Github:
Source
Copyright
- Copyright © 2022-2024 Threat Patrols Pty Ltd <contact@threatpatrols.com>
- Copyright © 2018 Verb Networks Pty Ltd <contact@verbnetworks.com>
- Copyright © 2018 Nicholas de Jong <me@nicholasdejong.com>
All rights reserved.
License
- BSD-2-Clause - see LICENSE file for full details.